Install WebIOPi
When installing WebIOPi on my RPi, I followed the installation instructions for the Apache version. I choose this version since I'll be using the Apache web server for other features as my project evolves. Note that there is a small error on the instructions if you use a symbolic link to the webiopi directory. Create this link usingsudo ln -s /home/pi/webiopi /var/www/webiopi
Immediately after installation, you can test to see if you can render a web page. Assuming that your Raspberry Pi is connected to your network and its named raspberrypi, you can open a browser to http://raspberrypi/webiopi/ with your network PC. It might work but your likely to get a error, something like "...Could not reliably determine the server’s fully qualified domain name..." and the solution is to give your web server a name.
To do this, create this Apache config file:
sudo vi /etc/apache2/conf.d/fqdn
Enter ServerName raspberrypi into this file and restart Apache using
sudo /etc/init.d/apache2 restart
Installing GPIO Utilities
While checking on the status of of the Python based GPIO package on the RPI using the command dpkg -l | grep gpio, I concluded that the Occidentalis distribution I'm using doesn't have any Python libraries for GPIO.
Picking up some tips from Raspberry Pi E-mail Notifier Using LEDs. I determined that I need to install several python packages first. I did this via
sudo apt-get install python
sudo apt-get install python-dev
sudo apt-get install python-pip
With this done, now its time to install the required Python libraries but first, update the Python distribution by running
sudo easy_install -U distribute
Finally you can install the Raspberry Pi GPIO (General Purpose Input/Ouput) library:
sudo pip install RPi.GPIO
What did I find
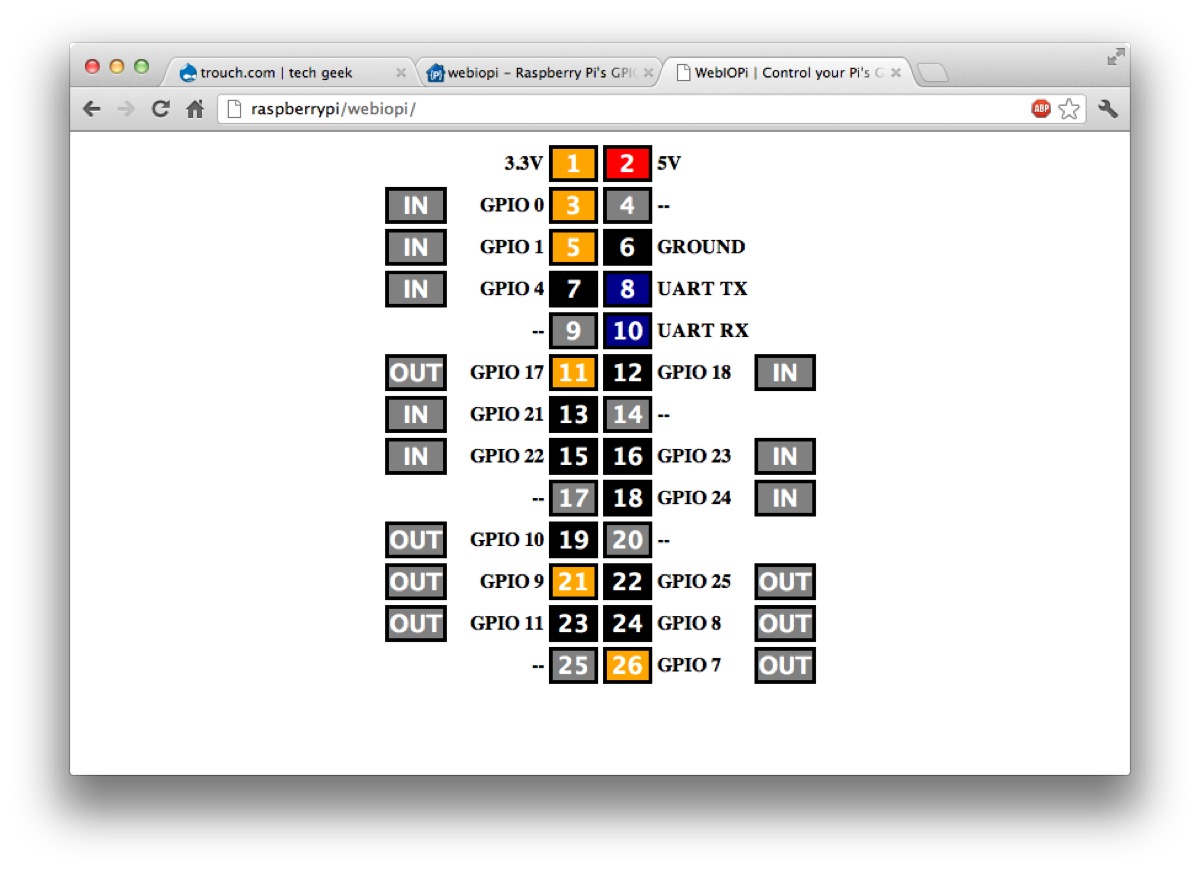
WebIOPi supports binary GPIOs, in both input and output. That is, you can set a GPIO output pin high/low via a browser pick. Also, you can see the state of a GPIO pin. Equally important to me is that WebIOPi auto-refreshes, via WebAPI, REST, JSON and AJAX I assume. Therefore, when the GPIO pins change state, the browser automatically is updated with the new status. And this happens for all browsers displaying WebIOPi. You can demonstrate this by opening two browsers pointing at WebIOPi. Action performed in one browser will also appear in the other.
Test Script
I used this code to generate some random activity on the GPIO pins and test WebIOPi.#!/usr/bin/env python import RPi.GPIO as GPIO, time BLINK_FREQ = 3 # refresh GPIO pins every 3 seconds GPIO.setmode(GPIO.BCM) GPIO.setup(0, GPIO.OUT) GPIO.setup(1, GPIO.OUT) GPIO.setup(4, GPIO.OUT) GPIO.setup(17, GPIO.OUT) GPIO.setup(21, GPIO.OUT) GPIO.setup(22, GPIO.OUT) GPIO.setup(10, GPIO.OUT) GPIO.setup(9, GPIO.OUT) GPIO.setup(11, GPIO.OUT) GPIO.setup(18, GPIO.OUT) GPIO.setup(23, GPIO.OUT) GPIO.setup(24, GPIO.OUT) GPIO.setup(25, GPIO.OUT) GPIO.setup(8, GPIO.OUT) GPIO.setup(7, GPIO.OUT) i = 0 while True: if i == 0: GPIO.output(0, True) GPIO.output(1, False) GPIO.output(4, False) GPIO.output(17, True) i = i + 1 elif i == 2: GPIO.output(0, False) GPIO.output(1, True) GPIO.output(4, True) GPIO.output(17, False) i = i + 1 elif i == 1: GPIO.output(7, False) GPIO.output(8, True) GPIO.output(25, True) GPIO.output(23, False) i = i + 1 elif i == 3: GPIO.output(7, True) GPIO.output(8, False) GPIO.output(25, False) GPIO.output(23, True) i = i + 1 elif i == 4: GPIO.output(21, True) GPIO.output(22, False) GPIO.output(10, False) GPIO.output(9, True) GPIO.output(11, True) GPIO.output(18, True) i = i + 1 elif i == 5: GPIO.output(21, False) GPIO.output(22, True) GPIO.output(10, True) GPIO.output(9, False) GPIO.output(11, False) GPIO.output(18, False) i = i + 1 else: i = 0 time.sleep(BLINK_FREQ)
Alternative Approaches
The use of a Web page to control the RPi seems useful enough but what if the target environment for launching control messages is a cell phone? Maybe a phone app would be a better approach. Check out the post Raspberry Pi + iPhone: Control a RPi with an iPhone in 2 Minutes.
